Introduction
At ValueGameNode & VGNCloud, we understand that different applications require specific environments. Our Enhance-based Web Panel (web.vgncloud.com) allows you to toggle between multiple PHP versions and fine-tune your php.ini directives without touching a single line of server configuration files manually. This flexibility ensures compatibility for everything from legacy scripts to the latest high-performance frameworks.
Prerequisites
-
An active website created via the Add website > Start from scratch process.
-
Access to your site dashboard at web.vgncloud.com.
Step 1: Accessing Developer Tools
Once you are logged into the Web Panel, select the website you wish to modify from your Websites list. On the site-specific dashboard, locate and click the Advanced tab in the sidebar or main menu. Within this section, click on Developer tools.
Step 2: Changing the PHP Version
The PHP management section is located at the top of the Developer tools page.
-
You will see a dropdown menu displaying the current active PHP version.
-
Selection: Choose your desired version (e.g., PHP 8.3 for the latest features or PHP 8.1, which is a highly stable LTS version).
-
The change is applied instantly to your web server container, requiring no manual service restarts.
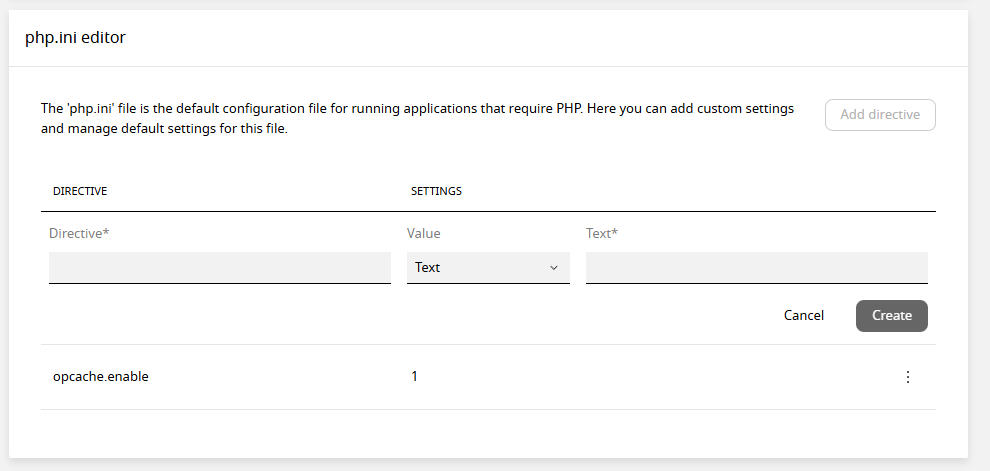
Step 3: Modifying php.ini Directives
If your application requires specific memory limits or performance tweaks, you can use the built-in php.ini editor found just below the version selection.
-
Add Directive: Scroll down to the PHP settings area and click the Add directive button.
-
Directive: Enter the specific setting name (e.g.,
opcache.enable). -
Type & Value: Choose the appropriate value type (e.g., Boolean for toggles or Text for numerical limits).
-
Example: To enable OPcache, set the directive to
opcache.enable, choose Boolean, and set it to Enabled.